You can embed videos in different places in Coachy:
- as a welcome video in your members area
- as an intro video to a course chapter
- as lesson content
- as a video within a text
Welcome video to your members area
Click on the gear in your member area to get to the settings. Now go to the "Home" tab and scroll down to the "Welcome video" item. You can either upload a video directly to us, or embed an existing YouTube, Vimeo or Wistia video using the appropriate ID.
Note also our tips on
video compression.
Intro video in course chapter
On the course overview page, click on the gear in the corresponding chapter tile to enter the chapter's settings. Now jump to the "Intro Video" tab. At this point, you can either upload a video directly to us, or embed an existing YouTube, Vimeo, or Wistia video using the appropriate ID
Be sure to also check out our tips on
video compression.
Learn how to add chapters to your course here.
Video as lesson content
Create a new lesson or click on the gear of an existing lesson to enter the settings. Now go to the "Video" tab. You can either upload a video directly to us here, or embed an existing YouTube, Vimeo or Wistia video using the appropriate ID. This also works with the ID of videos uploaded to Coachy, as long as you want to use a video multiple times and don't want to duplicate chapters or courses.
Note also our tips on video compression.
Learn how to create lessons in this article.
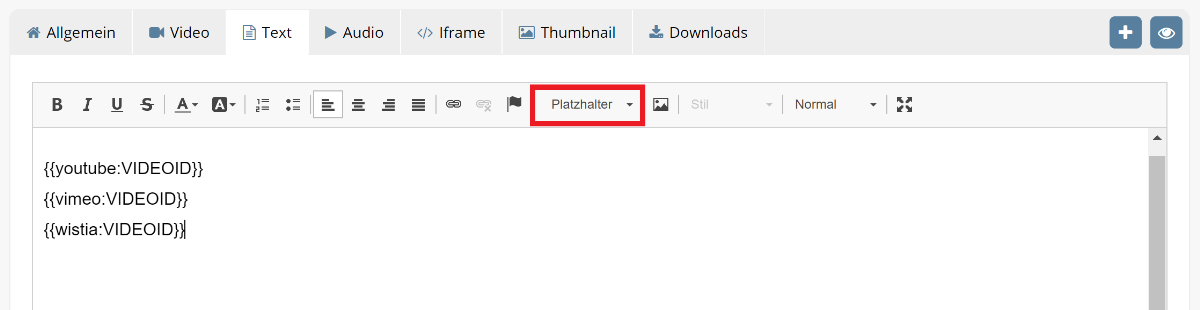
Include video within text
In all texts (e.g. description of a course, a chapter etc.) YouTube, Vimeo and Wistia videos can be embedded. The width of the embedded videos is automatically adjusted to the maximum screen width, so that they are also displayed properly on mobile.
For embedding, placeholders (YouTube / Vimeo / Wistia) can be inserted with the corresponding ID of the video: