Timing control

This page was translated into English automatically.
You can find the original article in German here.

Timing

With Coachy, you have the ability to time the unlocking of your content.
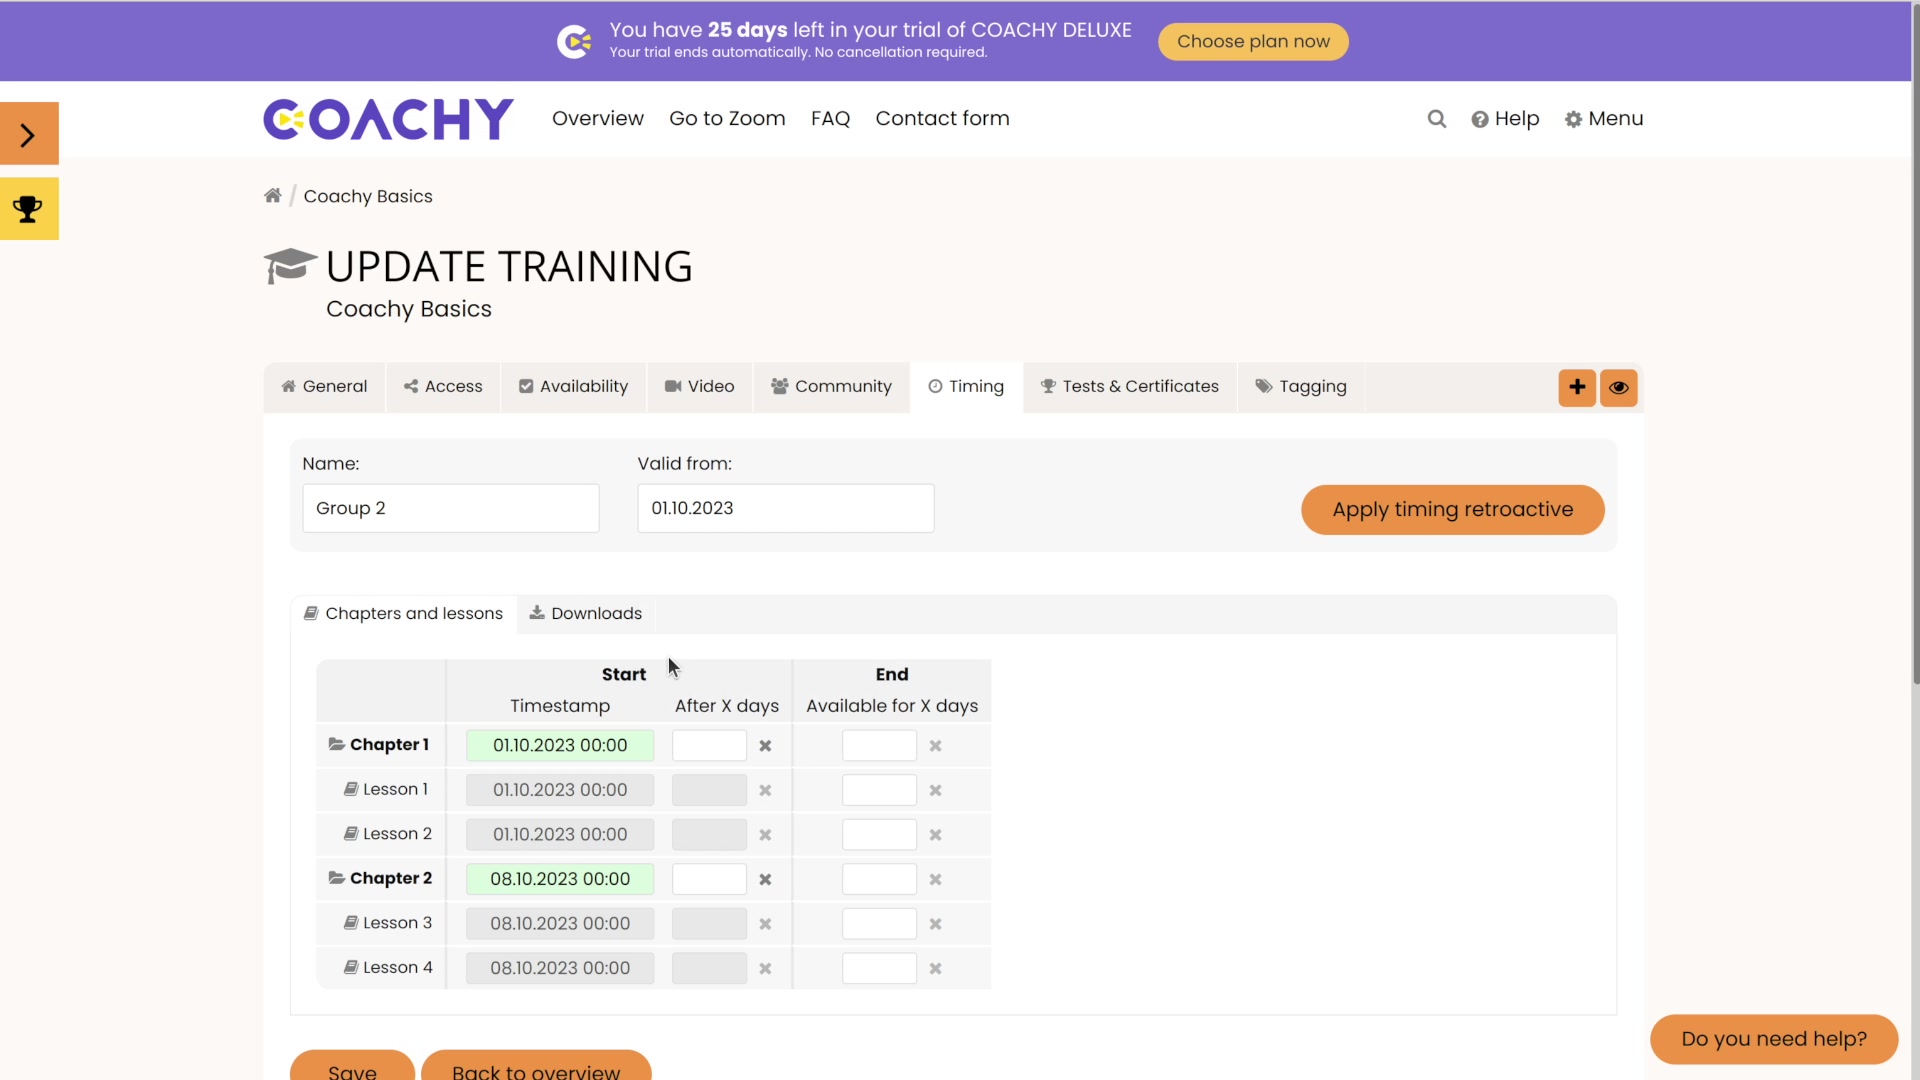
To do this, go to your course settings via the gear and switch to the timing control tab.

Here you can first create a temporal control. To do this, click on the Add Timing Control button. If necessary you can change the name and confirm it by clicking on the button. In the following overview, under the tab Chapters and lessons, you can now define the start time and, if necessary, the end time (how long the content should be available) of your chapters and lessons.

There are 2 ways to control the publishing of course parts in terms of time:

1) Release from a defined time (date / time)

Here you could set, for example, that the first chapter should be available immediately, but the second chapter only after a certain date.

2) Activation x days after the purchase of the course by your member

This can also be used to implement weekly activation, for example, if your second chapter should only be available 7 days after the first chapter.

  • Available for X days

    In the column Available for X days you can set that a chapter should be available for a certain number of days after purchase. This feature is also interesting if you want to host an online congress and the content should only be available for a certain time.

  • Use time control for different coaching groups

    Challenges or groups that start at different times can also be implemented with the help of time control. For this you have to work with different groups, for which you set individual schedules. How this works exactly becomes more understandable via an example:

    Create group 1

    First create the first schedule control and give it a name via the Name field, e.g. "Group 1". Also, use valid from to specify which members will be assigned to this group - for example, all members who purchase the course as of 04/01/20

    Now make the correct time setting for unlocking the content. In our case, chapter 1 should be unlocked from 01.05.20 and chapter 2 from 08.05.20. When you have created the schedule, click on "save". If you now go back to the overview via the corresponding button, you can see that Coachy has created the time control "Group 1". All the members who buy your course from 01.04.20 will now be assigned to this group and will start with week 1 of your course content on 01.05.

    Create Group 2

    Now create another time-based control and name it "Group 2", for example. This group should apply to the members who missed the start of the first group. So set valid from to 01.05.20 - all users who buy your course from this day on will be assigned to group 2. The content should be activated from 01.06.20. To do this, create a weekly schedule again and click save.

    When you jump back to the overview, you will see both created groups as well as their validity. Furthermore you will find a hint which group is currently - according to its validity period - used for new members.

  • Subsequently changing the individual reference time for time control

    If you want a member to start at a different time in the automatically assigned time control, you can assign them a individual reference time afterwards via the member's edit mode by clicking on the pencil. This is useful when a member joins later or already has some prior knowledge and can skip the beginning of a course.

  • How does the Timing feature work?

    Timings always operates at the course level, which means settings made, are not directly reflected in a member's settings. Instead, timings are only assigned or linked to a member. Each member can be assigned one time control per course. An assignment can be done automatically (with access to a course) or manually by you as an admin (more on this below). This assignment of the timing to a member means, that changes to a timing also automatically affect every member assigned to that timing. So in order to change the settings for a specific member only, they must be given their own timing (more on that below).

  • What timing is automatically assigned to members?

    No matter how many time controls you have created - one of them will always be automatically assigned to your new members. This applies to every type of access, regardless of whether it is a purchase, free access, created manually or imported. The date entered in the Valid from field controls which timing this is. If you have multiple timings, this is the most recent date from the past. In the overview of your time controls, this is also shown to you again by a corresponding note (see screenshot):

    The other timing controls that are not automatically assigned to members (e.g. Timing 1 and Timing 2) can still be used by manually assigning those to members individually (see next question).

  • How can I (manually) change the timing for a single member?

    This is done through member management. To do this, go to Menu and then Members. Find the relevant member and click Edit. If you scroll down, you'll see an overview of what timing is currently assigned to that member. You can remove the assignment of the timing to the member via the recycle bin (see screenshot):

    The time control itself remains - only the assignment to the member is deleted. You can then use the add time control button to select any previously created time control (see last question) and assign it to the member (see screenshot):